

Introduction
When I first heard about Google Web Designer, I was intrigued—could this tool really be free? As a designer, I’m always on the lookout for powerful yet affordable tools, and Google’s offering seemed too good to be true. In this article, I’ll explore whether Google Web Designer lives up to its promise and how it compares to other options in the market.
Key Takeaways
- Google Web Designer is completely free to download and use, with no hidden costs.
- It’s ideal for creating interactive HTML5-based designs and animations.
- The tool integrates seamlessly with other Google products like Google Ads.
- While powerful, it may lack some advanced features found in paid alternatives.
- Perfect for beginners and small businesses looking for a cost-effective design solution.
Introduction to Google Web Designer
What is Google Web Designer
Google Web Designer is a free, professional-grade tool for creating engaging HTML5 content. Whether you’re designing ads, websites, or animations, it offers a intuitive interface with drag-and-drop functionality. I found it particularly useful for crafting responsive designs that adapt to different screen sizes effortlessly.
The purpose of Google Web Designer
The primary goal of Google Web Designer is to simplify the creation of dynamic web content. It’s especially handy for marketers and designers who need to produce visually appealing ads or interactive elements. For instance, if you’re working on e-commerce projects, this tool can streamline your workflow.
Who can benefit from Google Web Designer
From freelancers to small businesses, Google Web Designer caters to a wide audience. If you’re just starting out in web design, this tool provides a gentle learning curve. However, even seasoned professionals can leverage its features for quick prototyping or ad creation.
Understanding the Cost of Google Web Designer
Is Google Web Designer really free
When I first explored Google Web Designer, I was pleasantly surprised to find that it’s entirely free to use. Unlike many professional design tools, there are no hidden fees or subscription models. This makes it an excellent choice for freelancers, small businesses, and even hobbyists looking to create stunning web content without breaking the bank. The free model ensures accessibility for everyone, regardless of budget constraints.
However, while the tool itself is free, you might incur costs if you integrate it with other platforms like cloud computing services or premium hosting solutions. It’s worth noting that Google Web Designer is designed to work seamlessly with Google Ads, which could involve advertising costs if you’re using it for marketing purposes.
Comparing Google Web Designer with paid alternatives
In my experience, Google Web Designer holds its own against paid alternatives like Adobe Animate or Webflow. While it may lack some advanced features found in premium tools, its intuitive interface and robust animation capabilities make it a strong contender. For instance, its integration with Google Drive and other Google services offers a level of convenience that many paid tools can’t match.
That said, if you’re looking for advanced functionalities like graphic design or complex 3D modelling, you might need to invest in a paid solution. But for most users, especially those focused on creating HTML5 ads or simple web animations, Google Web Designer is more than sufficient.
Getting Started with Google Web Designer
How to download Google Web Designer
Downloading Google Web Designer is a straightforward process. Simply visit the official Google Web Designer website and click the download button. The installer is lightweight, and the entire process takes just a few minutes. I appreciated that there’s no need to create an account or sign in, making it hassle-free for new users.
Once downloaded, the installer guides you through the setup, and you’re ready to start designing. It’s worth mentioning that the tool is available for both Windows and macOS, ensuring compatibility with most systems. If you’re unsure about the installation, you can always refer to the blog for step-by-step guides.
System requirements for installation
Before installing Google Web Designer, it’s essential to check your system meets the minimum requirements. The tool runs smoothly on most modern computers, but you’ll need at least 4GB of RAM and a dual-core processor. I found that a dedicated graphics card isn’t necessary, but it can enhance performance when working with complex animations.
Additionally, ensure you have enough storage space—around 500MB should suffice. The tool is optimised for efficiency, so even older machines can handle it without issues. If you’re planning to use it alongside other design software, consider upgrading your hardware for a smoother experience.
First steps after installation
After installing Google Web Designer, I recommend exploring the welcome screen, which offers tutorials and templates to get you started. The interface is user-friendly, with drag-and-drop functionality that makes it easy to create your first project. I found the built-in templates particularly helpful for beginners, as they provide a solid foundation for learning the ropes.
Take some time to familiarise yourself with the tool’s panels and settings. The web design community is also a great resource for tips and tricks. Don’t hesitate to experiment—Google Web Designer is forgiving, and you can always undo mistakes as you learn.
Exploring Google Web Designer Features
Key features overview
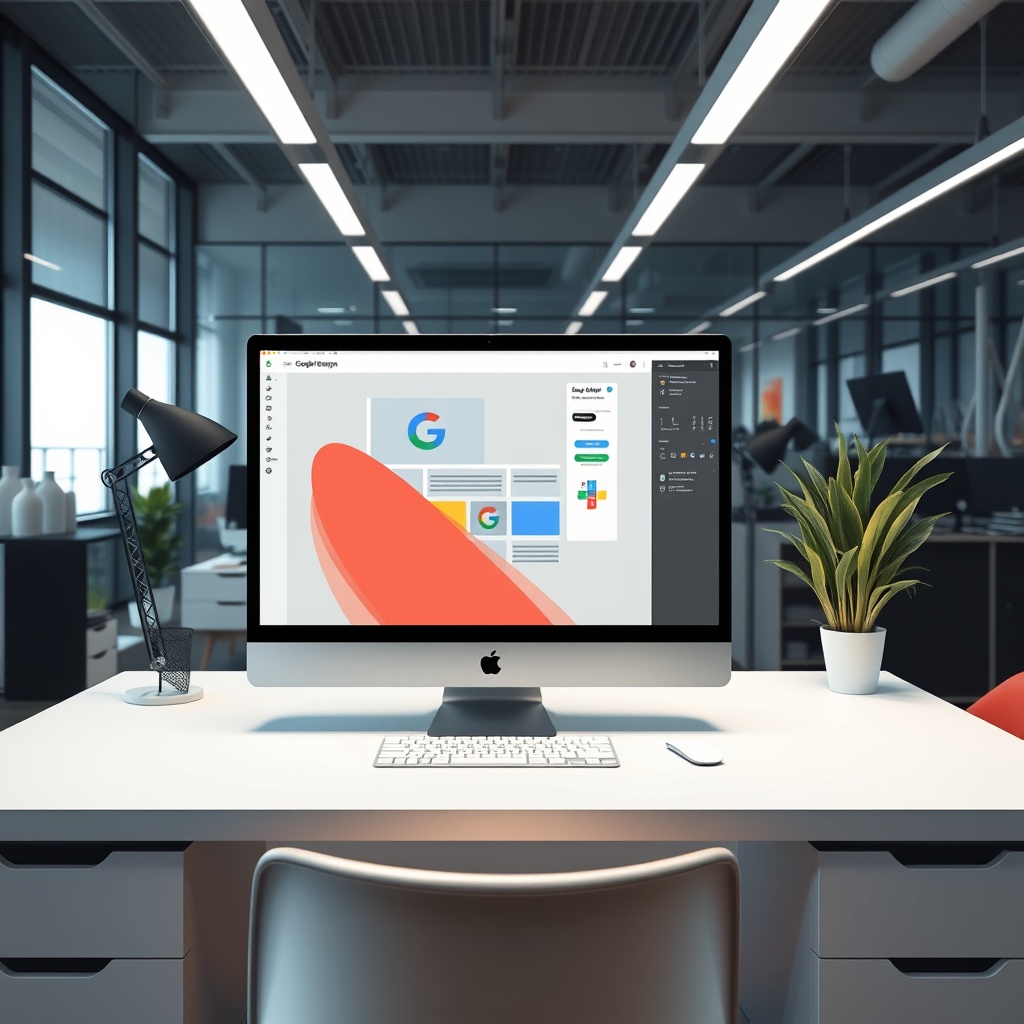
Google Web Designer is packed with features that cater to both beginners and advanced users. Its HTML5-based environment allows for the creation of responsive designs that adapt to different screen sizes. I was particularly impressed by the timeline-based animation tools, which rival those found in premium software. The ability to switch between design and code views is a game-changer for those who prefer hands-on control.
Another standout feature is the integration with Google Drive, enabling seamless collaboration and cloud storage. Whether you’re working solo or as part of a team, these features streamline the design process. For more insights, check out this authoritative guide on getting started.
Design capabilities
The design capabilities of Google Web Designer are impressive, offering a range of tools for creating visually appealing content. From vector-based drawing to advanced typography options, it covers all the basics and more. I found the CSS panel especially useful for fine-tuning styles without diving deep into code. The tool also supports custom fonts, allowing for greater creative freedom.
For those looking to create interactive elements, the event system is a powerful feature. It lets you add actions like clicks or hover effects with minimal effort. While it may not replace dedicated graphic design software, it’s more than capable of handling most web design needs.
Animation and interactivity tools
Google Web Designer excels in animation, offering both timeline and keyframe-based options. The motion path tool is a personal favourite, allowing for smooth, dynamic animations with ease. I also appreciated the pre-built components, which save time when adding interactive elements like buttons or sliders.
The tool’s event system adds another layer of interactivity, enabling actions like page transitions or form submissions. Whether you’re creating ads or full-fledged web pages, these features make it easy to bring your ideas to life. The learning curve is minimal, making it accessible even for those new to animation.
Creating Your First Project in Google Web Designer
Setting up a new project
When I first open Google Web Designer, I’m greeted with a clean interface that makes setting up a new project straightforward. I can choose between HTML or AMP formats, depending on my needs. The tool also offers a variety of templates, which is perfect for beginners like me who want a head start. Customising the canvas size ensures my design fits perfectly across different platforms.
Once I’ve selected my preferences, I’m ready to dive into the creative process. The intuitive layout means I don’t waste time figuring out where tools are located. Whether I’m designing a banner or a full webpage, the initial setup is seamless. This simplicity is one of the reasons I keep coming back to Google Web Designer for my projects.
Choosing the right template
Templates in Google Web Designer are a lifesaver, especially when I’m short on time. The library includes options for ads, animations, and even full web pages. I appreciate how each template is designed with best practices in mind, ensuring my final product looks professional. For instance, e-commerce templates come pre-optimised for conversions.
I often tweak these templates to match my brand’s aesthetic. The flexibility to modify colours, fonts, and layouts means I don’t feel constrained. Even if I’m not a design expert, the templates help me create something polished. It’s a great way to learn while producing high-quality work.
Adding elements to your design
Adding elements is where the fun begins. Google Web Designer’s drag-and-drop interface lets me place images, text, and buttons effortlessly. I can also import assets from other tools, which saves me a lot of time. The graphic design tools are robust enough for advanced users but simple enough for beginners like me.
Interactive elements, like buttons with hover effects, are easy to implement. The timeline feature allows me to animate these elements without writing code. It’s empowering to see my designs come to life with just a few clicks. This level of creativity is what makes Google Web Designer stand out.
Advanced Design Techniques in Google Web Designer
Using CSS and JavaScript for advanced designs
For more complex projects, I rely on CSS and JavaScript within Google Web Designer. The built-in code editor is user-friendly, with syntax highlighting and auto-complete features. I can switch between design and code views seamlessly, which is perfect for fine-tuning my creations. This flexibility is ideal for web design professionals who want full control.
Even if I’m not a coding expert, the tool provides snippets and examples to guide me. I’ve learned a lot by experimenting with these features. The ability to integrate custom scripts means my designs can be as unique as I envision them. It’s a powerful way to push the boundaries of what’s possible.
Creating responsive designs
Responsive design is a must in today’s multi-device world, and Google Web Designer makes it easy. The responsive mode lets me preview how my design adapts to different screen sizes. I can set breakpoints and adjust elements accordingly, ensuring a flawless experience on any device. This feature alone saves me hours of manual tweaking.
I also appreciate the dynamic workflows, which automatically scale content for different audiences. Whether I’m targeting mobile users or desktop viewers, my designs look consistent. This level of automation is a game-changer for efficiency. It’s one of the reasons I recommend this tool to fellow designers.
Implementing 3D designs and animations
3D designs and animations add a wow factor to my projects, and Google Web Designer handles them beautifully. The timeline’s advanced mode allows me to create intricate animations with ease. I can manipulate objects in 3D space, adding depth and realism to my designs. This feature is perfect for trendy, eye-catching ads.
The tool also supports CSS 3D transforms, which opens up even more creative possibilities. I’ve created everything from rotating product displays to immersive storytelling experiences. The learning curve is gentle, and the results are impressive. It’s a fantastic way to elevate my work.
Integrating Google Web Designer with Other Tools
Working with Google Ads
One of the biggest advantages of Google Web Designer is its seamless integration with Google Ads. I can export my designs directly to the platform, saving time and reducing errors. The tool even optimises my files for ad specifications, ensuring compliance. This integration is a lifesaver for marketing campaigns that need to go live quickly.
I also appreciate the ability to preview how my ads will look across different placements. The dynamic ad workflows mean I can create one design that adapts to multiple formats. This efficiency is invaluable when working on tight deadlines. It’s a feature that sets Google Web Designer apart from other tools.
Exporting projects to other platforms
While Google Ads is a primary focus, I often need to export my projects to other platforms. Google Web Designer supports multiple formats, including HTML5, ZIP, and even GIFs. This versatility means I can use my designs anywhere, from social media to email campaigns. The export settings are customisable, giving me control over file size and quality.
I’ve also used the tool to create standalone web pages. The clean code it generates ensures compatibility with most hosting services. Whether I’m sharing my work with clients or publishing it online, the process is hassle-free. It’s a testament to the tool’s adaptability.
Collaboration features
Collaboration is key in my workflow, and Google Web Designer supports this with shared projects. I can work with team members in real-time, making edits and leaving comments. The version history feature ensures I never lose progress, even if multiple people are working on the same file. This functionality is perfect for agencies or remote teams.
I also appreciate the ability to export project files for review. Clients can provide feedback directly, streamlining the approval process. The tool’s collaborative features make it easy to work efficiently, no matter where my team is located. It’s a must-have for modern design workflows.

Optimizing Your Designs for Different Devices
Understanding device compatibility
Device compatibility is a critical consideration in my design process. Google Web Designer’s responsive tools help me ensure my work looks great on any screen. I can test my designs on simulated devices, identifying potential issues before they arise. This proactive approach saves me from last-minute fixes and ensures a smooth user experience.
I also rely on the tool’s analytics to understand how my designs perform across devices. This data-driven approach helps me make informed decisions. Whether I’m targeting smartphones or tablets, I can tailor my designs accordingly. It’s a level of precision that sets my work apart.
Testing your designs on multiple devices
Testing is a non-negotiable step, and Google Web Designer simplifies it. The preview feature lets me see my designs in action across various screen sizes. I can spot alignment issues or broken elements early, ensuring a flawless final product. This thoroughness is essential for maintaining professionalism.
I often use external tools like BrowserStack for additional testing. Combining these resources gives me confidence that my designs will work everywhere. The peace of mind this provides is invaluable, especially for high-stakes projects. It’s a step I never skip.
Tips for mobile optimization
Mobile optimization is more than just scaling down designs. I focus on touch-friendly elements, like larger buttons and simplified navigation. Google Web Designer’s responsive grids help me maintain consistency, while the dynamic resizing ensures content fits perfectly. These small tweaks make a big difference in user experience.
I also prioritise performance, ensuring my designs load quickly on mobile networks. The tool’s asset optimisation features help me strike the right balance between quality and speed. By following these best practices, I create designs that are both beautiful and functional. It’s a win-win for me and my audience.
Publishing and Sharing Your Projects
How to publish your designs
Once your design is ready, publishing it is straightforward. I navigate to the “Publish” option in Google Web Designer, which allows me to export my project to Google Drive, Google Ads, or as an HTML5 file. This flexibility ensures my work is accessible across platforms. For those integrating with e-commerce websites, exporting as HTML5 is particularly useful.
Sharing options and permissions
Sharing projects is seamless with Google Web Designer. I can set permissions to control who views or edits my work, whether it’s a client or collaborator. The ability to share via Google Drive simplifies collaboration, ensuring everyone stays on the same page. For businesses, this feature aligns well with cloud computing workflows.
Tracking the performance of your designs
After publishing, tracking performance is crucial. Google Web Designer integrates with Google Analytics, allowing me to monitor engagement metrics. This data helps refine future designs, ensuring they resonate with the target audience. For those focused on SEO, these insights are invaluable.
Troubleshooting Common Issues in Google Web Designer
Solving installation problems
Occasionally, installation hiccups arise. I ensure my system meets the requirements and disable conflicting software. If issues persist, reinstalling often resolves them. For beginners, referencing blog tutorials can provide step-by-step guidance.
Fixing common design errors
Design errors, like misaligned elements, are common. I use the built-in debugger to identify issues. Adjusting CSS or JavaScript usually fixes these problems. Keeping projects organised prevents many errors from occurring in the first place.
Where to find help and resources
Google’s support forums and documentation are my go-to resources. For complex issues, the community often provides solutions. External guides, like those on G2, offer additional insights into troubleshooting and best practices.
Best Practices for Using Google Web Designer
Design best practices
I prioritise clean, responsive designs to ensure compatibility across devices. Using templates as a starting point saves time while maintaining consistency. For inspiration, I explore design trends to keep my work fresh and engaging.
Performance optimisation tips
Optimising assets, like compressing images, improves load times. I also minimise JavaScript to enhance performance. Testing designs on multiple devices ensures they run smoothly, providing a seamless user experience.
Maintaining project organisation
Keeping files and layers well-labelled is essential. I create folders for assets and use descriptive names for elements. This habit streamlines collaboration and makes future edits hassle-free.
Leveraging Google Web Designer for Business
Creating effective ads for your business
Google Web Designer excels at crafting interactive ads. I focus on clear messaging and eye-catching visuals to capture attention. Integrating these ads with Google Ads maximises their reach and impact.
Case studies of successful projects
Reviewing case studies helps me understand what works. I analyse campaigns that achieved high engagement, applying similar strategies to my projects. This approach ensures my designs align with business goals.
Measuring ROI on your designs
Tracking metrics like click-through rates and conversions is key. I use Google Analytics to assess performance, adjusting designs based on data. This iterative process ensures continuous improvement and measurable results.
Exploring Creative Possibilities with Google Web Designer
Innovative design ideas
Google Web Designer opens a world of creative possibilities, allowing us to experiment with cutting-edge designs. From interactive banners to immersive web experiences, the tool’s flexibility encourages innovation. I’ve found that combining its animation tools with custom CSS can produce stunning visuals. For inspiration, I often explore the Bennetts Design blog, which showcases inventive projects and trends.
One of my favourite techniques is layering animations to create depth. By using the timeline feature, I can synchronise movements for a seamless effect. The community around Google Web Designer is also a goldmine for ideas. Platforms like YouTube offer tutorials that push the boundaries of what’s possible, making it easy to learn and adapt new styles.
Pushing the limits of HTML5
Google Web Designer leverages HTML5 to its fullest, enabling us to create dynamic content without compromising performance. I’ve used its built-in components to build responsive ads that adapt to any screen size. The tool’s support for CSS3 transforms and transitions allows for smooth, professional-grade animations. For deeper insights, I recommend checking out Bennetts Design’s web design trends.
Advanced users can integrate JavaScript to add interactivity, such as clickable elements or data-driven animations. The ability to preview designs in real-time ensures everything works flawlessly before publishing. Whether you’re a beginner or an expert, Google Web Designer’s HTML5 capabilities make it a powerful ally in modern web design.
Inspiration from the community
The Google Web Designer community is a vibrant space where creators share tips, templates, and tutorials. I’ve learned invaluable tricks from forums and social media groups dedicated to the tool. For instance, the Bennetts Design list of top design tools includes resources that complement Google Web Designer perfectly.
Collaboration is another highlight. Many users upload their projects for feedback, fostering a culture of continuous improvement. By engaging with this community, I’ve discovered unconventional uses for the tool, such as creating interactive infographics or mini-games. It’s proof that creativity thrives when shared.
Keeping Up with Google Web Designer Updates
How to stay updated on new features
Google frequently updates Web Designer with new features and improvements. I subscribe to the official blog and follow their social media channels to stay informed. Additionally, joining forums like the Bennetts Design SEO guide helps me keep track of industry trends that might influence updates.
Another strategy is to enable automatic updates in the software settings. This ensures I always have the latest version without manual checks. Google’s release notes are detailed, highlighting new tools and bug fixes. Staying updated not only enhances my workflow but also ensures compatibility with other platforms.
The importance of updating your software
Regular updates are crucial for security, performance, and access to new features. I’ve noticed that skipping updates can lead to compatibility issues, especially when exporting projects. Google Web Designer’s updates often include optimisations that streamline the design process, such as improved rendering speeds or new asset libraries.
Outdated software can also miss out on critical bug fixes. For example, a recent update resolved a glitch that affected animation timelines. By prioritising updates, I avoid unnecessary setbacks and maintain a smooth, efficient workflow. It’s a small step that makes a big difference.
Future trends in web design tools
The future of web design tools lies in AI integration and enhanced collaboration features. Google Web Designer is likely to incorporate more automation, such as AI-driven design suggestions. I’m excited about the potential for real-time collaboration, allowing teams to work on projects simultaneously. For a deeper dive into emerging trends, this YouTube tutorial offers insightful predictions.
Another trend is the rise of immersive technologies like AR and VR. Google Web Designer’s 3D capabilities position it well for this shift. As these technologies become mainstream, the tool’s versatility will be invaluable. Staying ahead of these trends ensures my designs remain relevant and impactful.
Maximising Efficiency in Google Web Designer
Keyboard shortcuts and time-saving tips
Mastering keyboard shortcuts has significantly boosted my productivity in Google Web Designer. For instance, pressing “V” switches to the selection tool, while “B” activates the brush. I’ve also created custom shortcuts for frequently used actions, such as toggling rulers or grids. These small adjustments save hours over time, allowing me to focus on creativity.
Another tip is to use the “Quick Publish” feature for testing designs. It bypasses unnecessary steps, providing instant feedback. I also organise my workspace by grouping related tools and panels. A clutter-free interface reduces distractions and speeds up my workflow, making the design process more enjoyable.
Automating repetitive tasks
Google Web Designer’s scripting capabilities allow me to automate repetitive tasks. For example, I’ve written simple scripts to batch-export assets or apply consistent styling across multiple elements. This not only saves time but also ensures uniformity in my projects. The tool’s event system can trigger actions based on user interactions, adding another layer of automation.
I also rely on templates for common project types. By saving reusable components, I can start new designs with a solid foundation. Automation might seem daunting at first, but even small steps can yield significant efficiency gains. It’s about working smarter, not harder.
Streamlining your design workflow
A well-structured workflow is key to efficiency in Google Web Designer. I start by outlining my project’s goals and sketching a rough layout. Next, I gather all assets—images, fonts, and scripts—before diving into the design. This preparation prevents mid-project delays and keeps everything organised.
I also use layers and folders to manage complex projects. Naming conventions help me locate elements quickly, especially in large files. Regularly saving versions ensures I can revert changes if needed. By streamlining each step, I maintain a smooth, stress-free design process from start to finish.
Frequently Asked Questions
Can I use Google Web Designer for free?
Yes, Google Web Designer is completely free to download and use. It offers a robust set of tools for creating HTML5-based designs without any subscription fees. However, you may need additional resources like stock images or fonts, which could incur costs. The software itself remains a cost-effective solution for designers of all levels.
Is Google Web Designer suitable for beginners?
Absolutely. Google Web Designer’s intuitive interface makes it accessible for beginners, while its advanced features cater to professionals. The tool includes tutorials and templates to help newcomers get started. With practice, even those new to web design can create impressive projects. The learning curve is manageable, and the community is supportive.
How does Google Web Designer compare to paid alternatives?
Google Web Designer holds its own against paid tools, especially for HTML5 and ad design. While it may lack some advanced features of premium software, its free nature and seamless integration with Google products make it a compelling choice. For many projects, it offers everything you need without the hefty price tag.
Can I collaborate with others using Google Web Designer?
Currently, Google Web Designer doesn’t support real-time collaboration. However, you can share project files manually or use cloud storage for team access. The lack of built-in collaboration is a limitation, but the tool’s export options make it easy to share work for feedback or further editing.
